

In this blog post, we will be designing a character in Photoshop, finalising the design in Illustrator and rigging/animating in After Effects.
The wonderful thing about animation is that you can bring anything to life and give anything character. Even a simple shape or inanimate object can be given life and possess its very own personality that makes that thing unique. In our videos we try to inject personality and character where we feel we can to make our animations more interesting and give them a human touch. Character is a very powerful narrative device that can help communicate the story you want to tell.
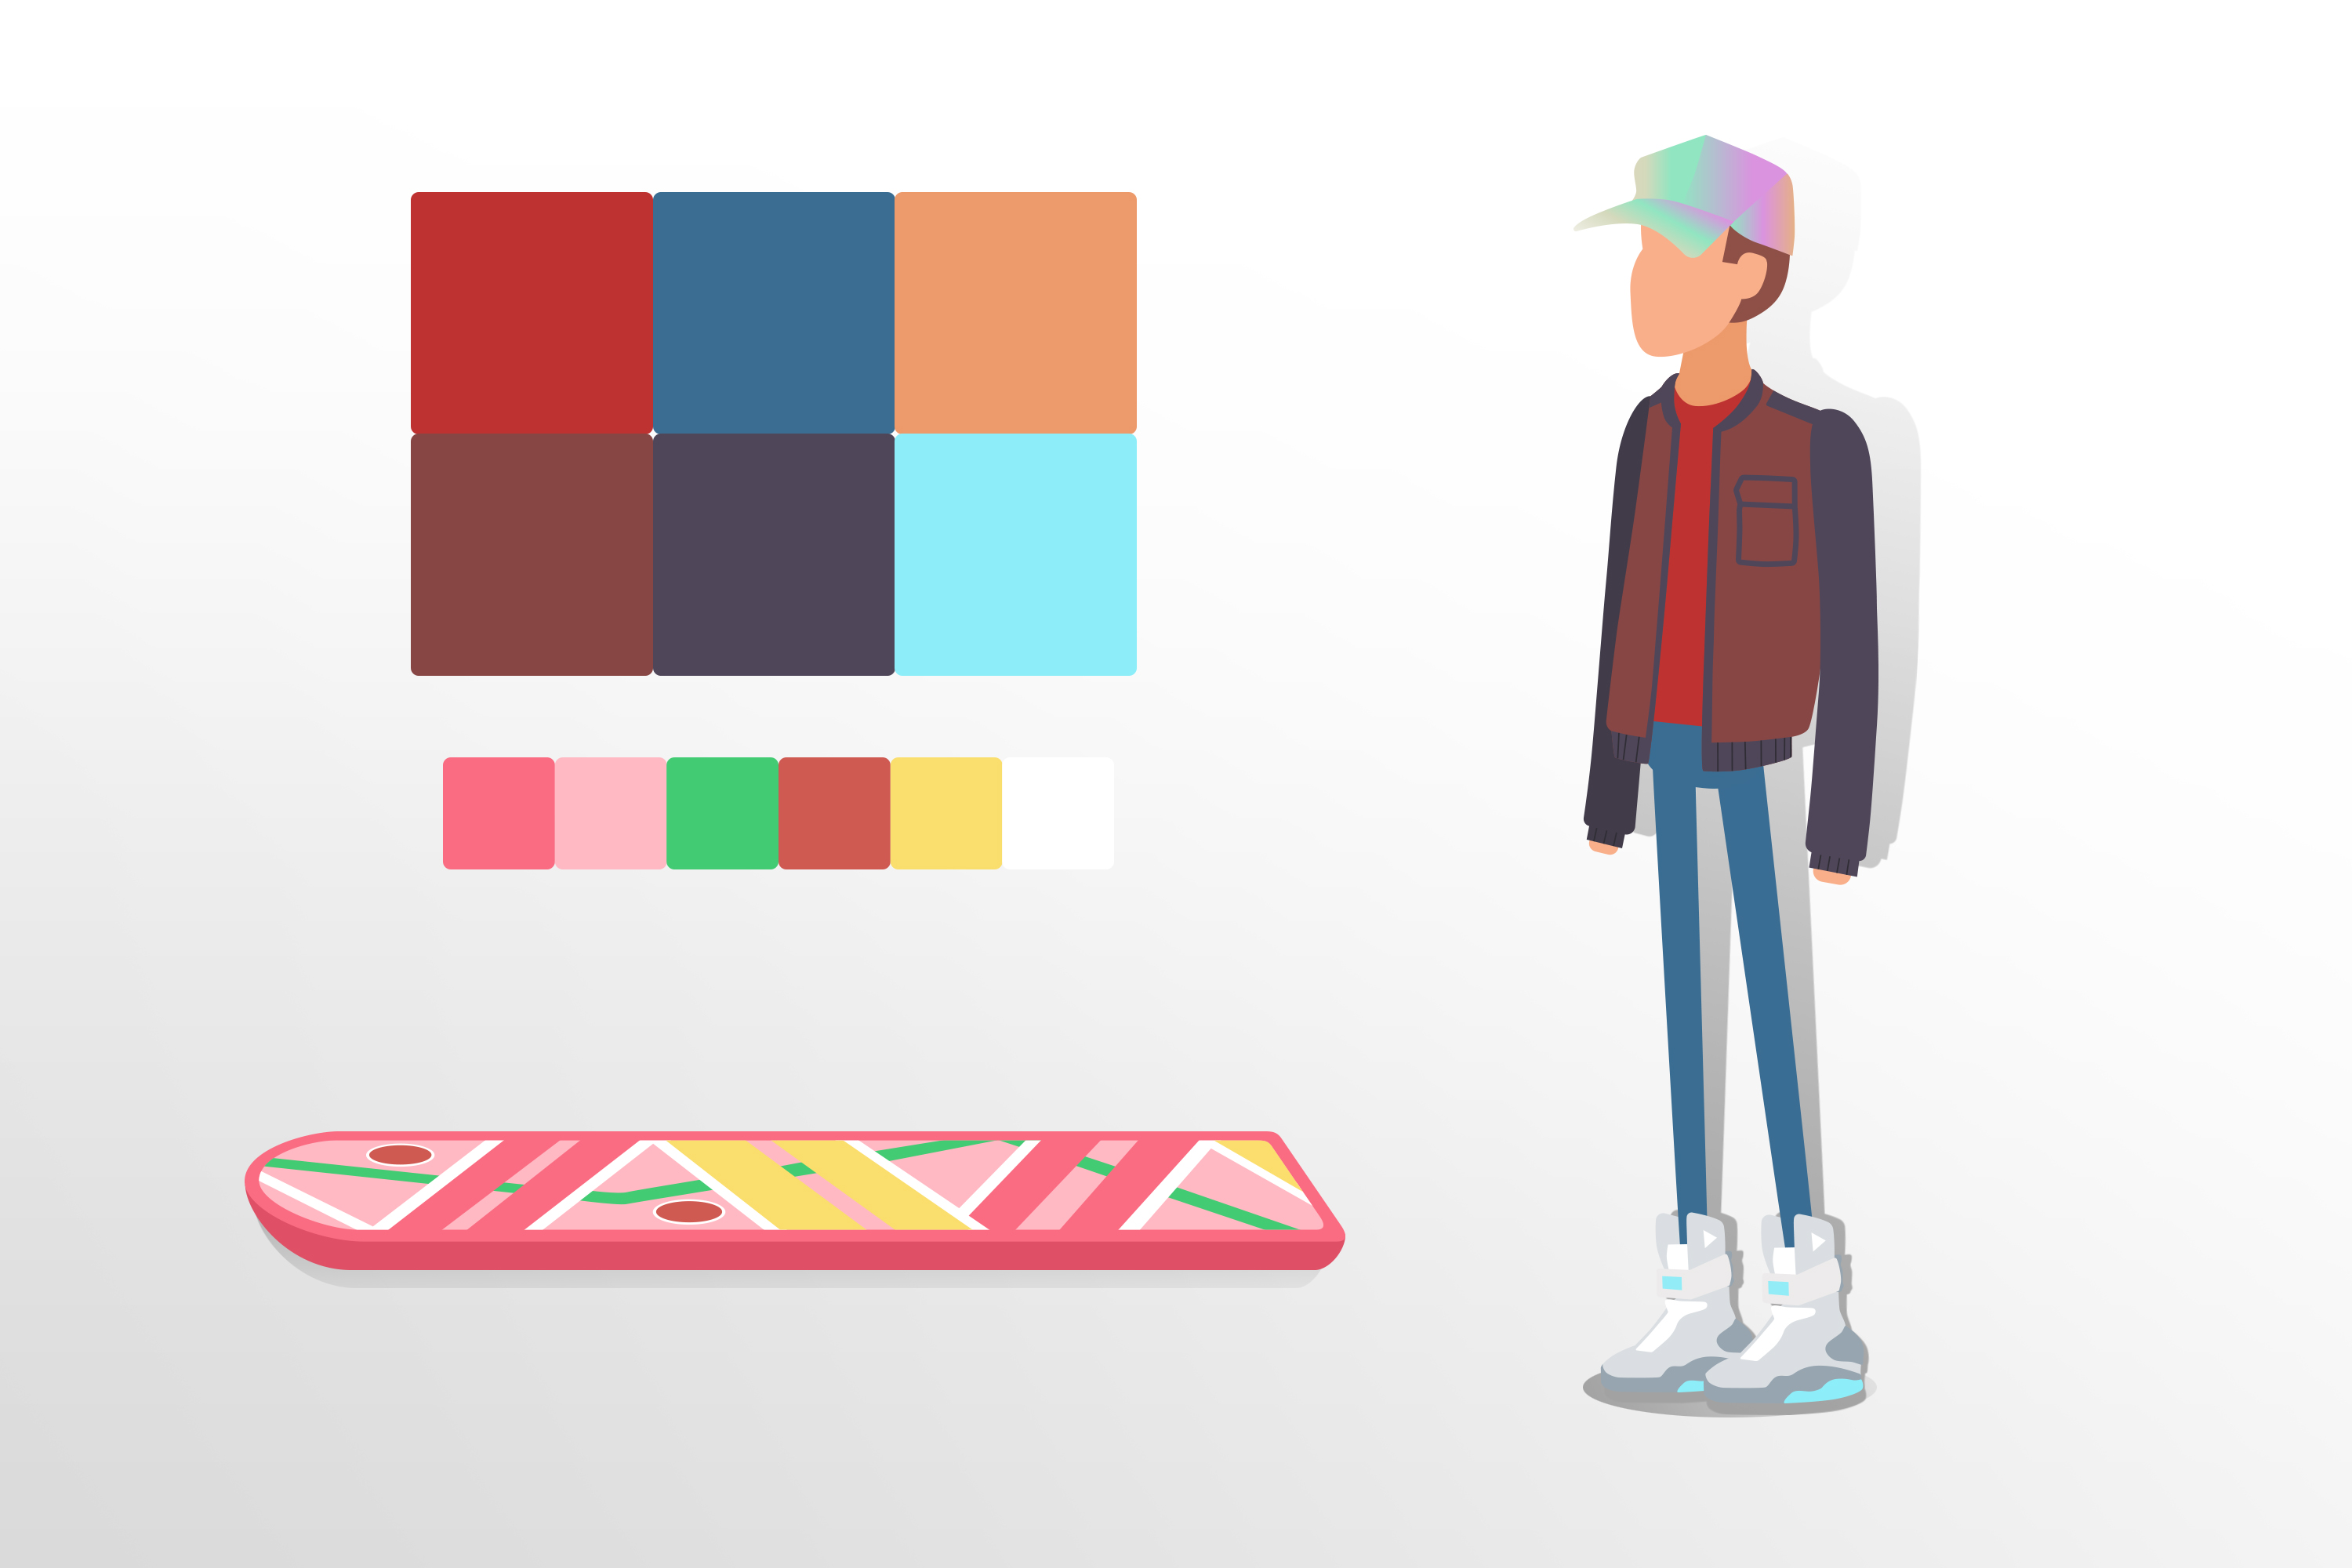
Using Photoshop, Illustrator and After Effects, I will be creating a stylistic version of Marty McFly from one of my favourite film trilogies Back To The Future. It is entirely possible to do all of this just within After Effects but I will be using the three pieces of software to show how you can use them together effectively to design build and animate your characters.

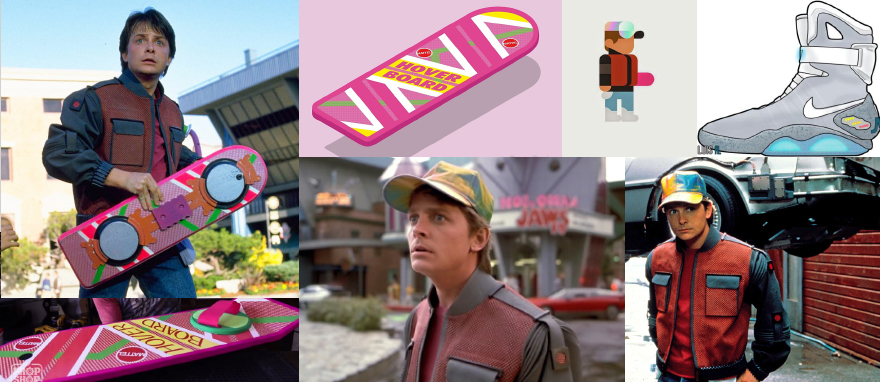
Before putting pen to paper (or stylus to wacom….?) I begin to find suitable reference imagery. Google Images is a great resource for this. I then create a montage of the images I’ve found using PureRef. PureRef is a really useful piece of free software that compiles all of your reference imagery into one document. You can just drag the image you want from a website/desktop and drop right into PureRef. Its also very easy to navigate around and also has a selection of features that come in super handy. It certainly beats having 20 different windows open at once.

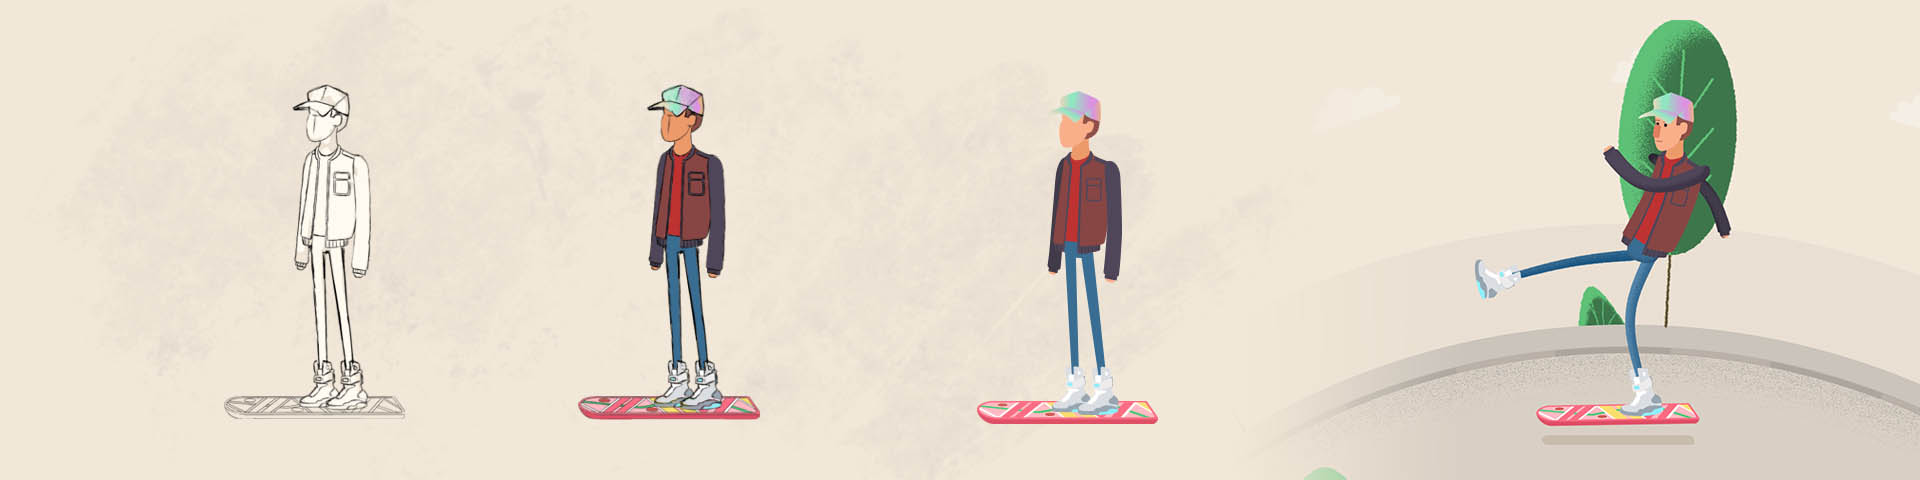
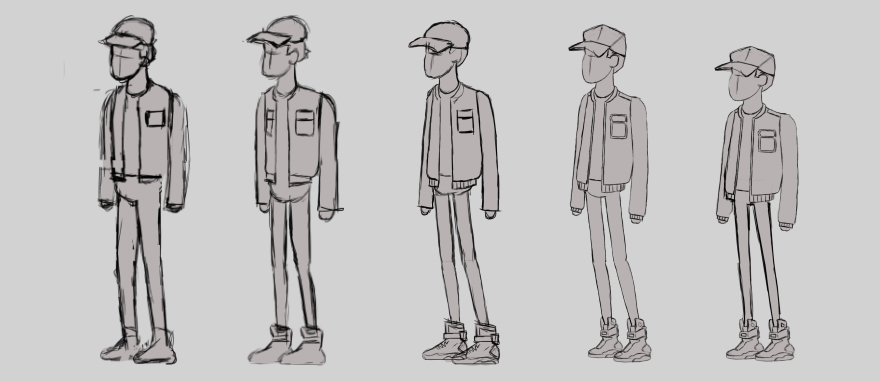
Working with the reference I have collected I start to loosely sketch out a few ideas and keep the initial designs fairly simple and rough. Once I’m happy with the general layout I begin to refine the design by setting the current layer opacity down to about 50% and finalize my line work on a new layer. Confident to move forward with my design I start to think about colour. I would like to keep my colour palette to a minimum and glance back at the reference imagery for inspiration. If you find it difficult to choose colours for your designs there are a few websites out there to help you. Adobe Kuler and coolors.co are generally very good. Using these resources you can gather inspiration and discover a suitable colour scheme for your animation fairly quickly.

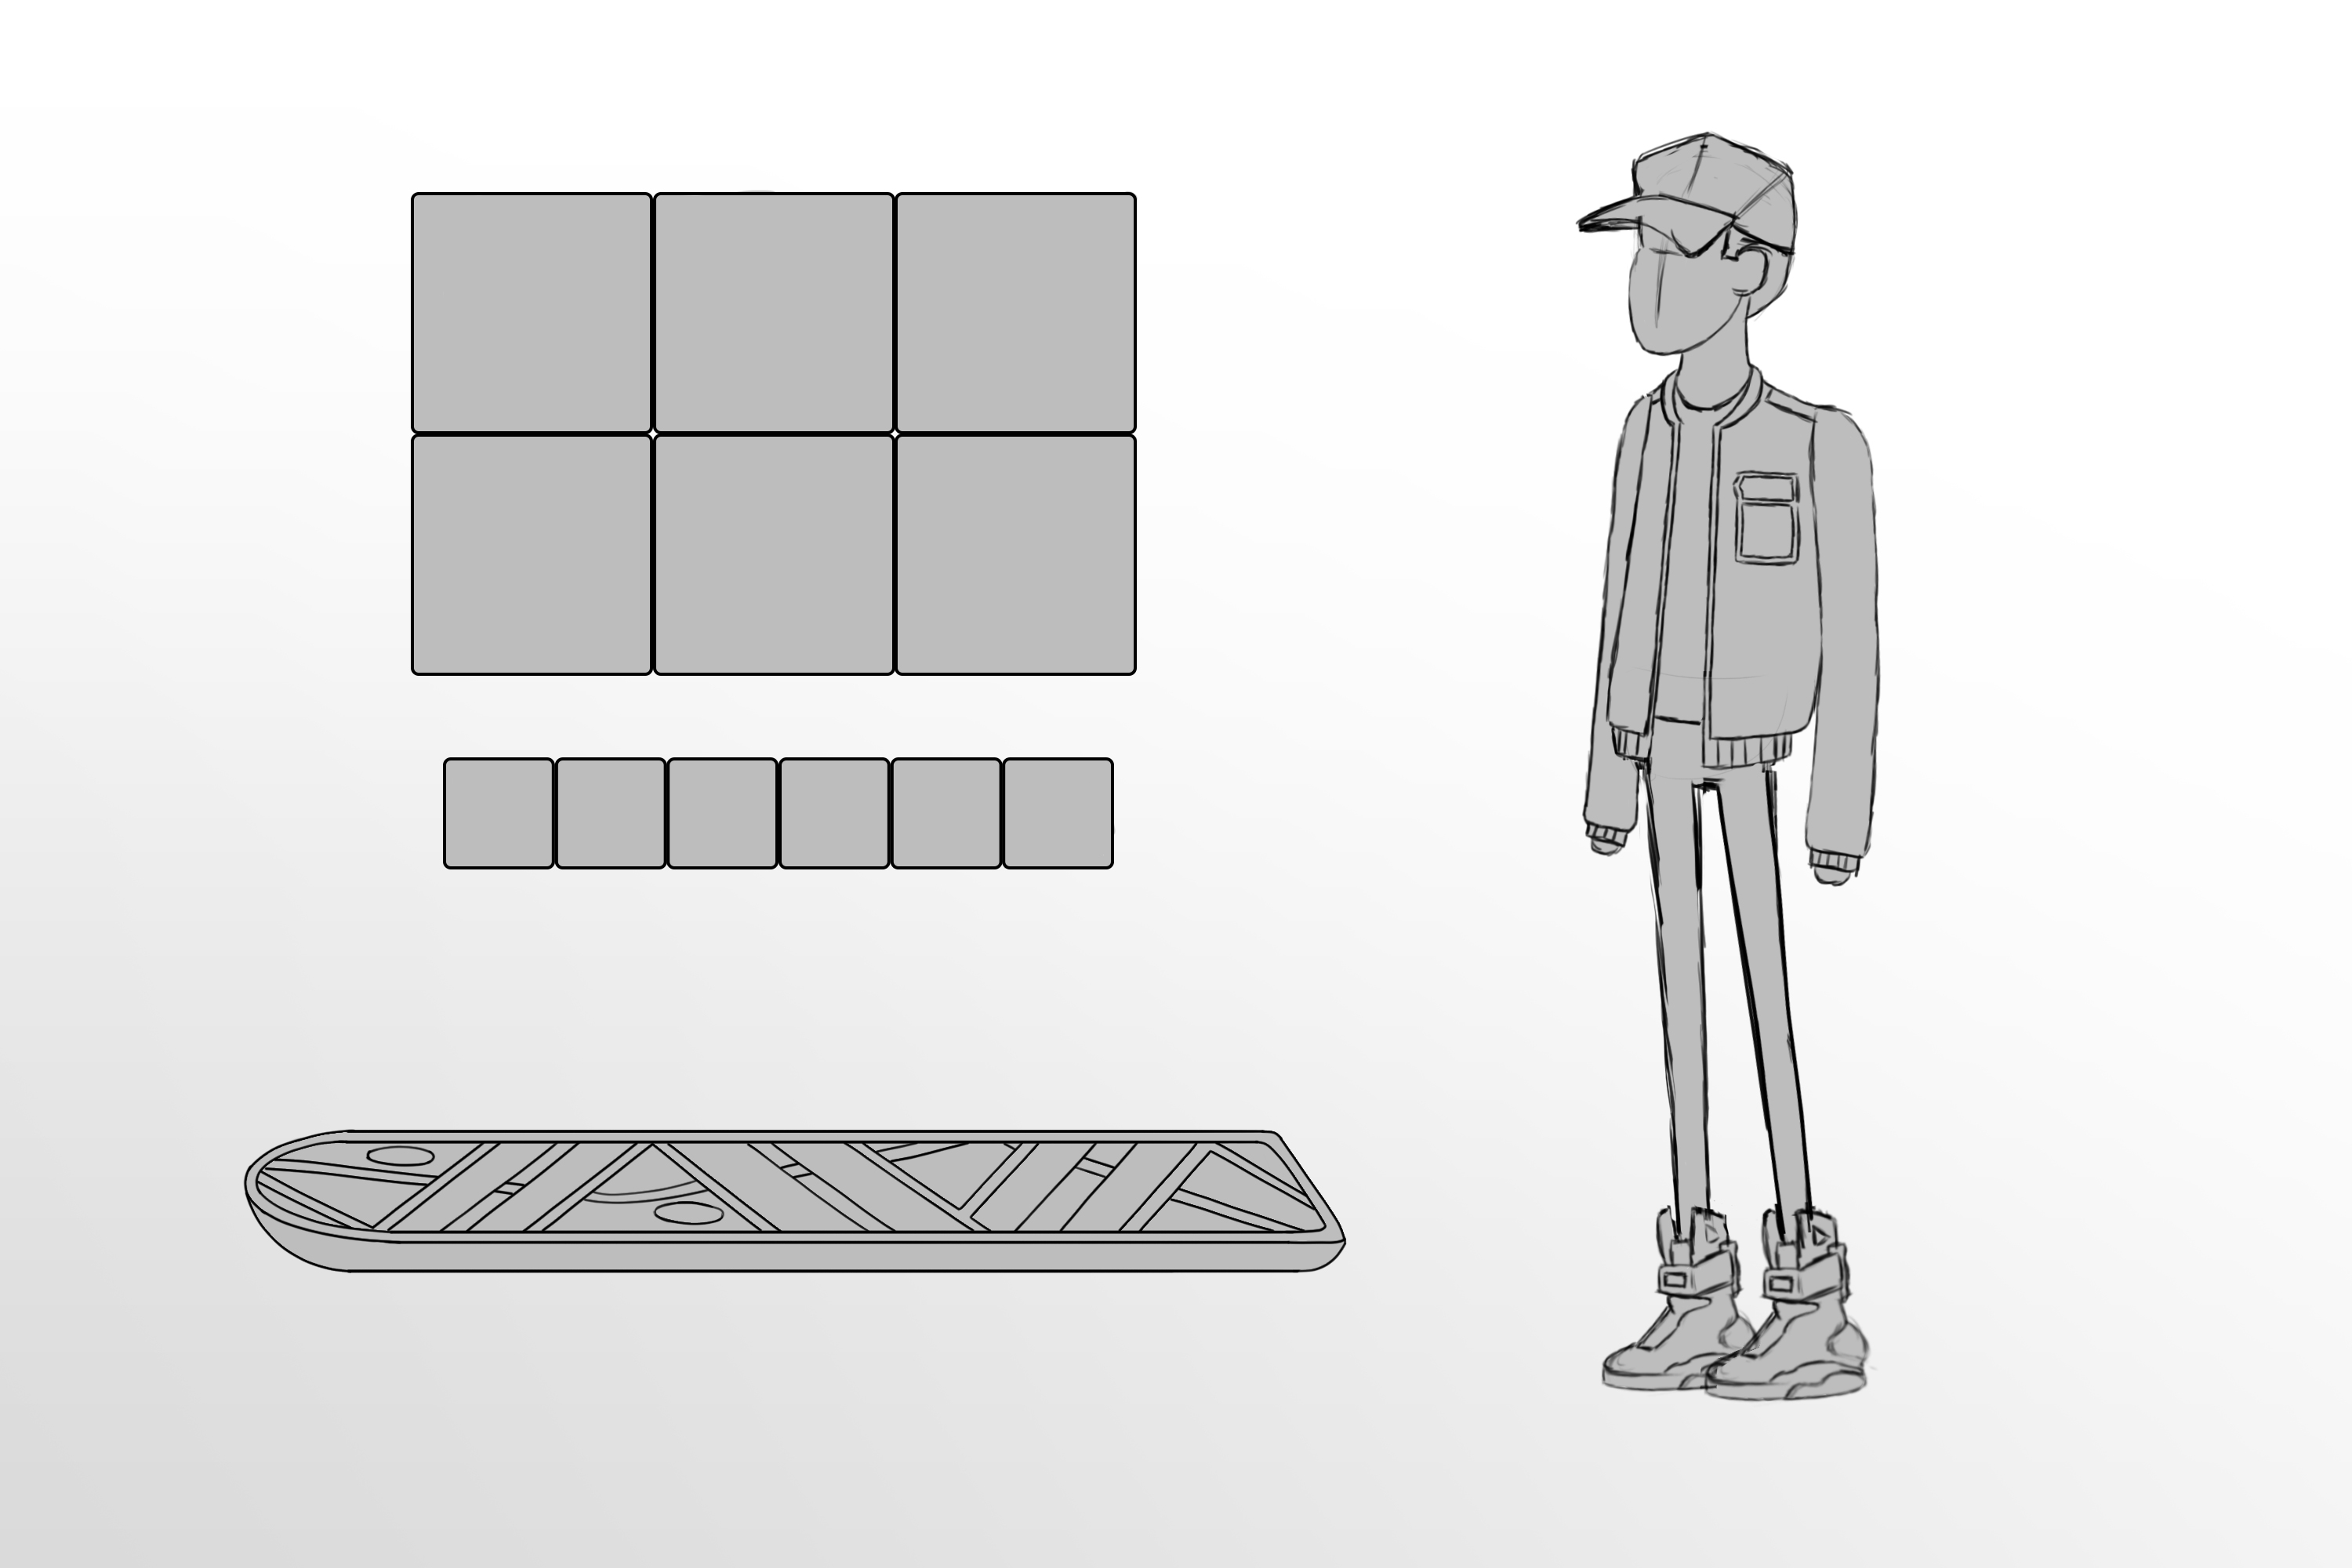
I am happy with the design and colour scheme so I move onto the next phase of the project and import them into Illustrator. I place the design on a bottom layer and begin to recreate the design making any changes I feel are necessary along the way. It is important to remember that layer structure and labelling is very important at this stage. I am not worried about the hoverboard as this will be placed onto its own layer. However the character will be a little more complicated to setup for the rigging process within After Effects. Here is a generic layer structure I would normally create for a humanoid character:
Right arm, Right hand, Hair, Head, Torso, Neck, Waist, Right shoe, Right leg, Left shoe, Left leg, Left arm.
With these layers separated it will certainly help the rigging process in After Effects. I then think about any props or costume extras that could be attributed to the character that could tie-in with the design and decide to include the crazy multi-coloured hat from the second film. To break the hat design down, I separate it into four different sub layers. Side, front right, front left and the peak. On each of these sub layers I add a gradient and choose colours I think will compliment the rest of the palette. Happy with my final design, I save the character as an AI file.

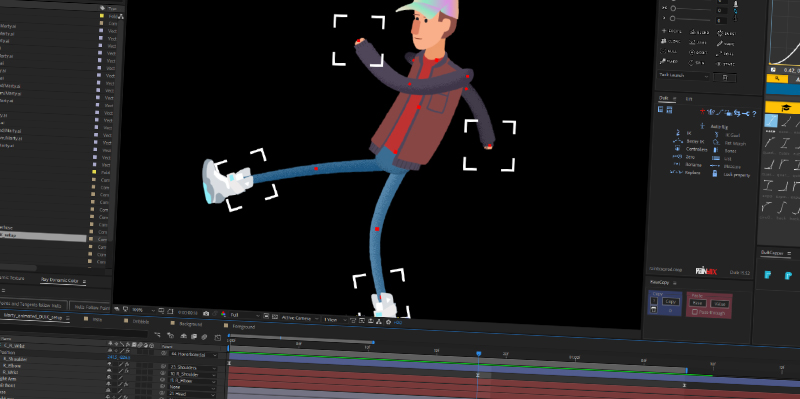
The next step brings us to After Effects where we will be rigging and animating our character. For this project I will be creating my main composition at 1920×1080. I keep my layers organized so that they can be easily re-positioned for other potential resolution sizes further down the line. I import my character file as a composition. This will have all of our layers in the order we created them. Very useful!
For the rigging process within After Effects I will be using a plug-in from Rainbox called Duik. This is a free plug-in and is a fantastic tool to help with rigging characters within After Effects. The latest version at time of writing is 15.5. Duik is worth supporting and they have a donation page on their website here. Any donations will allow Rainbox to continue improving this free plug-in and also help them to produce tutorials, user guides and all other non-profit actions. We have used Duik before in our videos, for example we used it to rig and animate Charlie from our short 2016 animation Charlie’s Boombox. If you need a bit of help understanding and using Duik there are plenty of tutorials currently available that cover the process end to end.
Once I have the rig set-up I move onto blocking out the animation. The main two poses I want are going to be the kick-off with the characters foot about to leave the ground & the pose at the relief of the push off before crouching down again. Using the controllers from Duik I create those two main poses and then I focus on the tweens, the timing and the animation curves to make the animation more exciting.
I then create a revolving background that appears to continually spin and I add some foliage and trees for a bit more interest. To add more detail to the animation I want to show contact and force in the kick-off part of the animation where the foot touches down and pushes away from the ground. To do this I create a separate shape layer and animate it frame by frame to create a small dust cloud. With most of the elements now in place I decide that I don’t like featureless Marty and decide to create some facial features within After Effects and parent them to the head layer.
I then export my animation as a looping GIF using GifGun. For more on GifGun see our After Effects Tools – #005 blog post. Using the final file exported straight from GifGun I can now share the looping animation on our website as well as our social media pages.
I hope you found this blog post on character animation useful!